CMS migrations are a necessary evil for many companies. If your current technical setup is inhibiting your business from doing what it needs to be successful, then a CMS migration could be your way out. But migrations should not be taken lightly, and especially for large-scale websites that are changing urls. Any time you change urls, you run the risk of destroying SEO. And if SEO is an important driver of traffic for your site, then a migration could cause serious problems for your business.
Unfortunately, SEOs know Murphy’s Law all too well. It states, “Anything that can go wrong, will go wrong”. Well, large-scale migrations have many moving parts and the chances of a migration going live without some type of hiccup are rare. And you might find many hiccups, gremlins, or flat-out mistakes once the button is pushed and a migration goes live. But to me, it’s how you react once those gremlins are found that can make or break your migration. Quick checks and fast refinements can end up saving your SEO. Speed and accuracy matter.
The Summer of Migrations
For whatever reason, this is the summer of migrations and redesigns for me. Several of my large-scale clients are either migrating to a new CMS or they are redesigning their websites. Therefore, I’ve been neck deep in the strategy, testing, implementation, and auditing of each move. And based on my work this summer, I decided to write a post explaining what you can do as soon as the migration goes live to ensure all is ok (or to nip SEO problems in the bud).
Specifically, I have provided eight immediate checks you should make as soon as your new site goes live. The eight checks cover what you can do immediately following a push to production and can help catch serious problems before they become bigger ones. For SEOs, large-scale CMS migrations are not for the faint of heart. They are stressful, there’s a lot on the line, and there are many areas to monitor to ensure all goes well.
The Power of a Crawlable and Testable Staging Server
Before I hop into the top eight checks you should make after a migration goes live, I wanted to touch on a very important element to a CMS migration – the staging server.
If you can have your new site up and running on a staging server that’s accessible and crawlable to your SEO consultant or agency, then you can (typically) thoroughly test that setup prior to the migration going live. For clients that have this available, I’m able to crawl the new site in staging, test redirects, analyze technical SEO elements, browse with multiple devices, and more. It’s a much easier transition for a site that has a staging server accessible and crawlable than one that doesn’t.
If you don’t thoroughly test the new site in staging, including testing the redirects, you’ll have to test like mad as soon as the new site goes live. And believe me, you will find problems. Then you’ll need to fix those problems on the fly. And those fixes could lead to other problems, that will need to be fixed quickly as well… so on and so forth. It’s a slippery slope.
Keep this in mind if you are planning a CMS migration. Don’t proceed on faith alone… Test and know. That’s how you can nip serious SEO problems in the bud.
Some Prerequisites
Before we move on, you’ll need a few things in place. First, make sure you have all variations of your site set up in Google Search Console (GSC). That includes www, non-www, and if applicable, https www, and https non-www. And if specific subdomains are part of the migration, make sure you have them set up as well. For example, subdomain.domain.com.
Second, you should have already collected your top landing pages from the old site. You should export all top landing pages from Google Search Console, Google Analytics, Bing Webmaster Tools, and various link analysis tools. Then you should combine them and dedupe them. That’s your core list of urls to check after the migration goes live. I’ll cover more about this soon.
Third, you’ll need a tool that can crawl your site. The two crawlers I use extensively are DeepCrawl (for large-scale crawls) and Screaming Frog (for smaller crawls or for laser-focused crawls). This is how you will check your redirects in bulk. Note, I’m on the customer advisory board for DeepCrawl. It’s one of my favorite tools for enterprise crawls and I’ve been using it for years.
OK, now that you have the necessary elements in place, it’s time to perform eight immediate checks once the migration goes live. Note, the following list is just the beginning of your testing process. You definitely want to continue analyzing the migration over time to ensure all is ok. What I’m providing below should be checked as the button is pushed and your new site goes live.
1. Robots.txt and robots.txt Tester
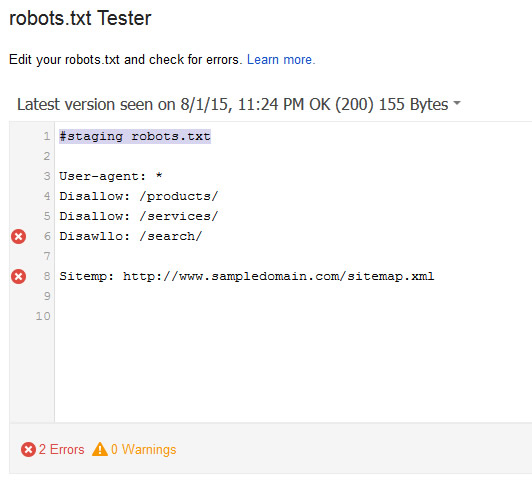
Yes, robots.txt is a simple text file, but one that can cause all sorts of problems. Developers will often use a staging-specific robots.txt file which can easily get pushed to production by accident. And if it blocks important files or directories from being crawled, you could kill your SEO traffic.
So check this first after the new site goes live. Make sure it’s the version that should be in production and that the directives are free of errors. And make sure important areas of the site are not being blocked. That includes CSS and JavaScript that are necessary for Google to render the page properly. More about that soon.
And use the robots.txt Tester in Google Search Console. It’s a sandbox that enables you to test urls on your site. If you notice urls being blocked that shouldn’t be blocked, hunt down the directives causing the problems. You can edit the robots.txt file in GSC to test your changes (without impacting your actual robots.txt file).
2. Check For Google Analytics and/or Other Analytics Code
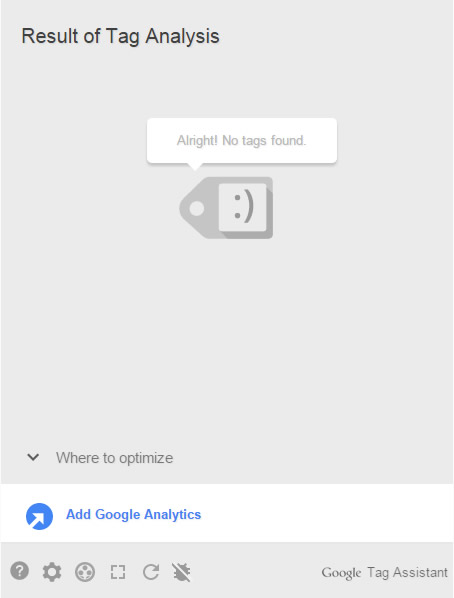
Before you and your client’s executive team check Google Analytics after the migration goes live, and have a heart attack, make sure you add the necessary analytics code to your new site. If not, you will see traffic drop off a cliff, when in fact, that’s not really happening. It’s a scary sight for sure.
And more importantly, you will lose visibility into how the migration is going. I continually check various sources of traffic over time after a migration goes live to ensure all pages are being handled properly. If you drop your tracking code, then you’ll be out of luck.
Quick Tip: Providing Analytics Air Cover
It’s not a bad idea to have multiple analytics packages running on a site. For example, I have some clients running both Google Analytics and Adobe Analytics on the same site. When a recent migration went live without GA tagging (by accident), we could check Adobe Analytics to see how the migration was going. It provided air cover as GA tracking was put in place.
3. Canonical URL Tag Errors
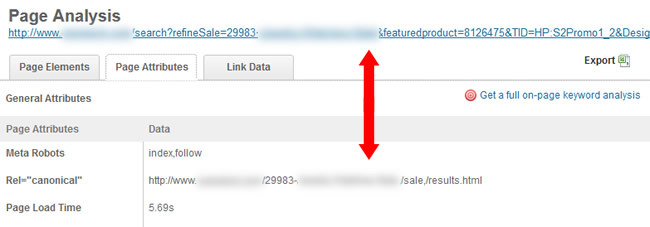
Rel canonical is a good example of a single line of code that can wreak havoc on your site SEO-wise. When the migration goes live, quickly check core page types on the site to ensure canonical url tags are set up properly. You can also quickly crawl a snapshot of the site to get a feel for how rel canonical is being handled in bulk. If not, you can destroy rankings and subsequent traffic to pages that were performing extremely well before the migration.
You can check my post about rel canonical problems to learn about the various issues that can be implemented by accident. For example, all canonicals pointing to a homepage, canonicals pointing to 404s, endless canonical loops, etc. A quick check of the canonical url tag after a crawl can save your SEO.
4. Meta Robots Tag Problems
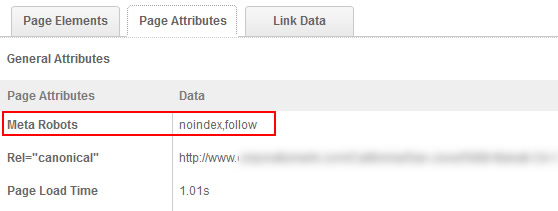
Along the same lines, the meta robots tag could have a serious impact on your site if the wrong content values are used. For example, you could be noindexing important pages, or on the flip side, you could be opening up pages that shouldn’t be indexed.
Again, manual checks plus a snapshot crawl will give you a view at the meta robots tag across many pages. You can start to pick up patterns and make changes before serious damage can be done.
5. Mobile-friendly Test (MFT)
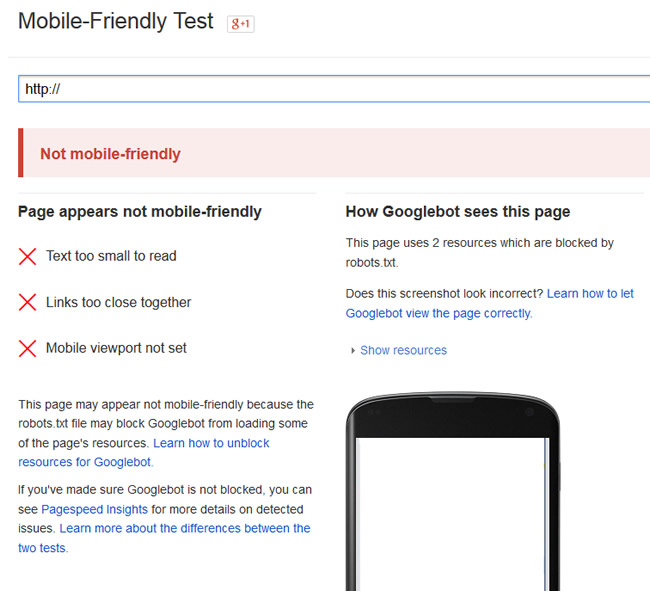
Since Google announced the mobile-friendly algorithm, many companies have taken the plunge and moved to a responsive design or mobile urls. So when you make a big change, like moving to a new CMS, you definitely want to check the mobile-friendliness of your new urls.
Unfortunately, you can’t run the mobile-friendly test on a staging server that requires authentication. You can definitely run others tests while in staging to ensure the site is mobile-friendly, which you should do. But remember Murphy’s Law… don’t trust that your staging urls are behaving the same way as your production urls. That’s why you should absolutely run Google’s official mobile-friendly test once the new site is live.
To begin, I recommend testing key urls by category. That would include your homepage, category urls, specific products or services, and other important types of pages on the site.
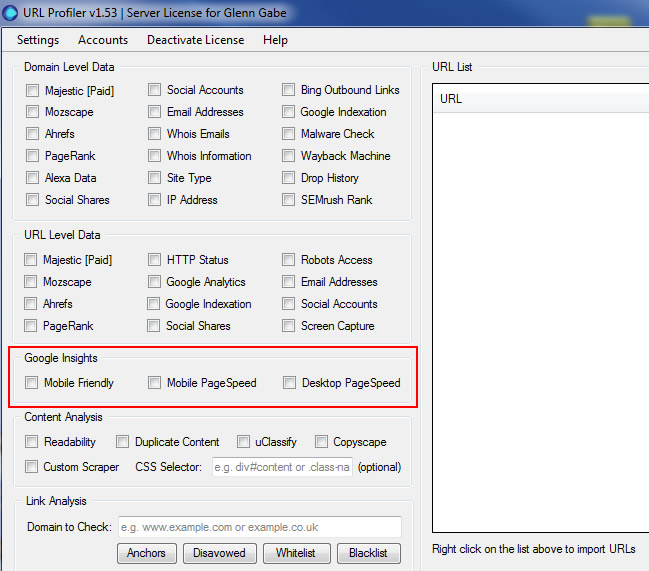
And then you can use a tool like Url Profiler to check mobile-friendliness in bulk. Import a list of urls on the new site and fire away. The resulting spreadsheet will provide details about mobile-friendliness. Then you can hunt down any problems and rectify them quickly.
6. Fetch and Render in GSC
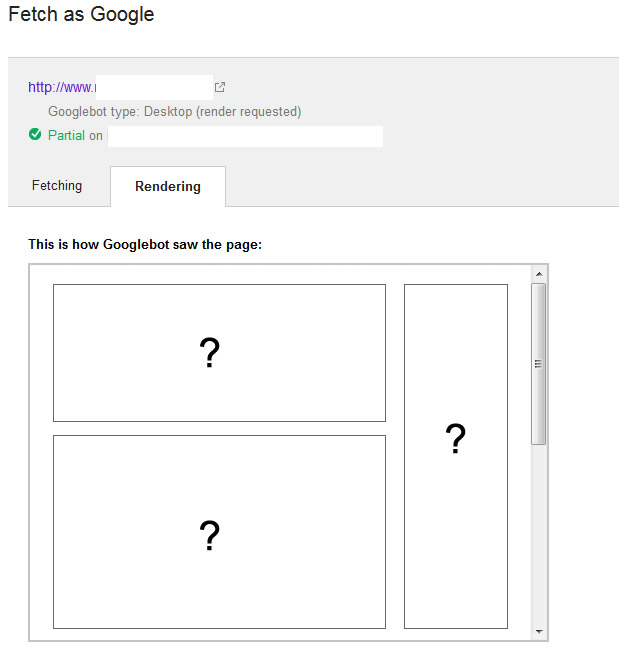
To ensure Google can fetch the necessary resources to accurately render the page at hand, you should run important urls through fetch and render in Google Search Console. Similar to the mobile-friendly test, you cannot run fetch and render on a staging server that requires authentication. Therefore, you’ll need to test this out as soon as the site goes live.
Google has explained repeatedly that if you block resources, including CSS and JavaScript, then that will impact how Google indexes your pages. Google wants to render the page just like a user would in a browser. So as I said on Twitter a few weeks ago, “If you want to rock, don’t block.” :)
7. Check XML Sitemaps
XML sitemaps are an important supplement to a traditional web crawl. Using sitemaps, you can feed both Google and Bing all of your canonical urls. After going live with a new CMS, you will have a list of new urls and old urls. In the short-term, you should submit both your old urls and your new ones via xml sitemaps. Continuing to submit your old urls for a short time will enable the engines to quickly find the 301 redirects to the new urls. That can quicken up the process of getting the new urls crawled and indexed.
Based on the migration, you will definitely want to check your new xml sitemaps to ensure they are being published accurately. First, you should check the sitemaps reporting in Google Search Console for both warnings and errors. If you see anything out of the ordinary, identify the problems and send to your developers ASAP. You want to nip problems in the bud.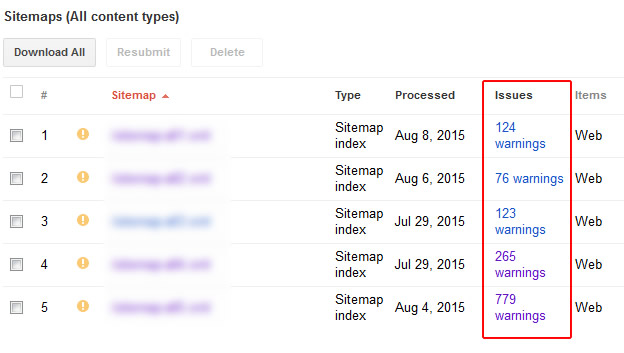
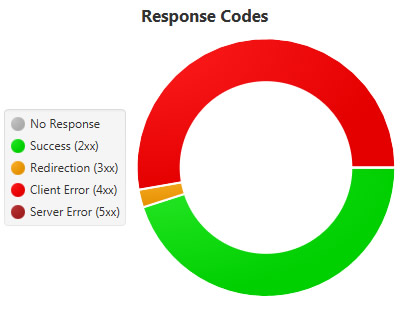
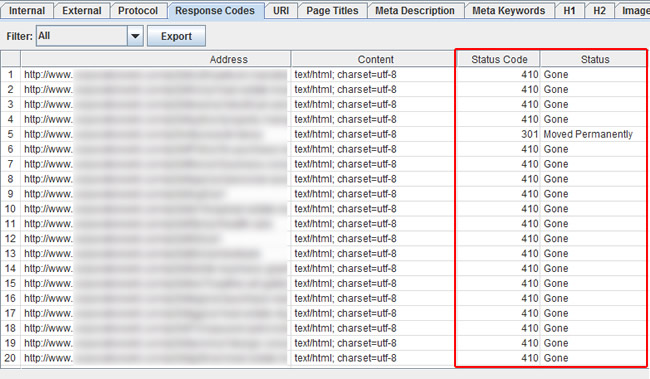
Second, you should crawl your new sitemaps to ensure they lead to the right urls that resolve with 200 header response codes. I can’t tell you how many times I’ve crawled new sitemaps and found 404s, 500s, and redirects. Note, if your old urls are changing, then they should 301, since the old urls are redirecting to your new ones. But the new sitemap should not have any redirects or non-200 response codes. You want clean sitemaps, not “dirty” ones.
You don’t want your crawl graph to look like this:
And while we’re on the topic of crawling urls, let’s jump to an incredibly important check – crawling your top urls from before the migration!
8. Crawl Top Landing Pages From The Old Site (and Check Redirect Chains)
When you migrate to a new CMS, there’s a good chance you’ll be changing urls. And even if one character changes in your url, then it’s a brand new one to Google. So, in order to maintain search equity during the migration, it’s critically important to organize and then crawl your top landing pages to ensure they resolve accurately. Your top landing pages are urls that ranked well prior to the migration, the ones driving traffic, the ones that have built inbound links, and obviously the ones sustaining your business. Don’t assume your redirects are working well. There are many reasons they might not be.
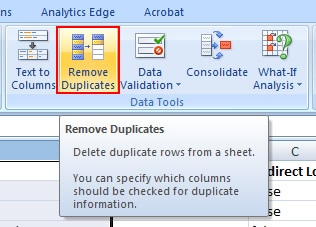
The first thing you need to do is collect all important landing pages (as explained earlier). You can find these landing pages in Google Analytics, Google Search Console, Bing Webmaster Tools, and from various link analysis tools. Once you download them all, you should combine them, and then dedupe them.
I use both DeepCrawl and Screaming Frog to check the redirects list. Depending on the size of your list, you might have a few hundred urls, or you might have a few hundred thousand urls (or even more). DeepCrawl is extraordinarily good at crawling many urls (over 100K), while Screaming Frog is outstanding for laser-focused crawls (under 50K urls).
When crawling with Screaming Frog, ensure that “follow redirects” is enabled in your settings. This will allow the Frog to not only check the url you feed it, but it will also follow the redirect chain. That’s incredibly important, since just setting up a 301 isn’t enough… That 301 needs to lead to a 200 code at the true destination url.
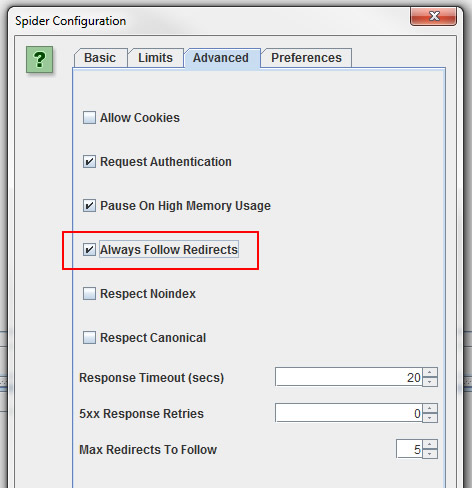
One of the biggest mistakes I’ve seen is assuming all 301s work perfectly. In other words, you crawl your top landing pages and they all 301. That’s great, but where do they lead? If they don’t lead to the new url that resolves with a 200 code, then you could be killing your SEO.
In Screaming Frog, crawl your urls and then export the redirect chains report (which is accessible from the reports dropdown). When opening that file in Excel, you will see the initial url crawled, the header response code, and the number of redirects encountered. You can follow the sheet along to the right to see the next url in the chain, along with its response code.
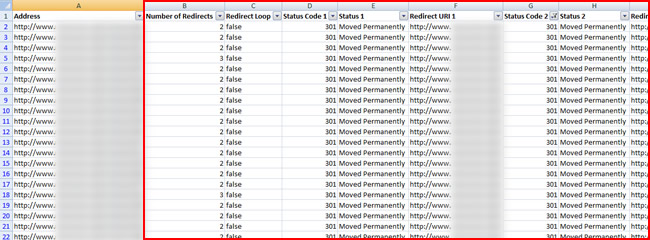
Does the destination url resolve with a 200 code or does that redirect again? If it redirects again, you are now daisy-chaining redirects. That’s not great, as Google will only follow a certain number of redirects before giving up. And as you can guess, you can keep following the chain to the right to see how each url in the list resolves. You might be surprised what you find… like three, four, or even more redirects in the chain. And even worse, you might find daisy-chained redirects that lead to 404s. Not good.
In DeepCrawl, you can export the 301 redirect report, which will also provide the redirect chain. If you have many urls to check, then DeepCrawl can be extremely helpful. It doesn’t run locally and can handle hundreds or thousands, or even millions of urls.
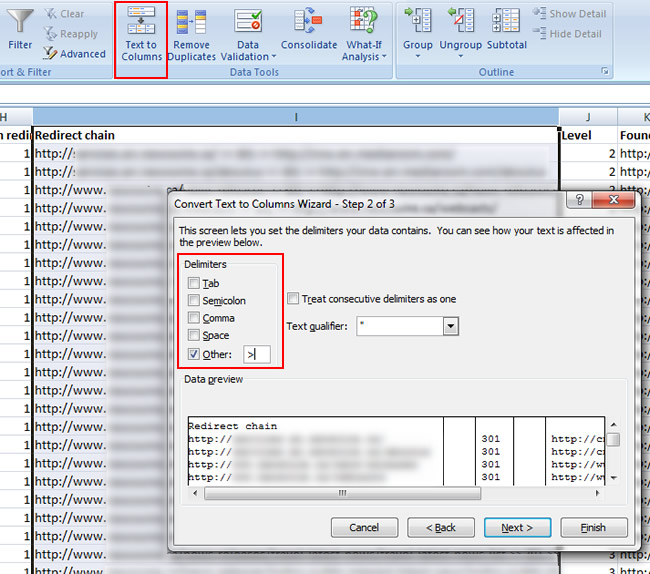
Once your export the urls, you’ll need to use Excel’s “text to columns” functionality to break apart the redirect chain column. Once you do, you can follow the chain to the right to see how each url resolves. Again, you might find 404s, excessive redirect chains, or redirects that lead to 500s or other errors. The core point is that you won’t know until you crawl the old urls, and the redirect chain. So crawl away.
Summary – Never Assume All Is OK With A Migration
Unfortunately, Murphy’s Law almost always comes into play with a CMS migration. And that’s especially the case for larger-scale websites with a lot of moving parts. Even if you’ve heavily checked a site in staging, make sure you perform the necessary checks once the new site is pushed to production. If not, you run the risk of having major problems severely impact SEO.
And the point of migrating to a new CMS isn’t to destroy SEO… it’s to increase the effectiveness of your website! Although the list I provided above is just a starting point, they are important factors to check once the new site goes live. Good luck.
GG

Besides being excellent advice for migrations, these are also great tips for things to check when just starting to do SEO on a new site that *hasn’t* been migrated.
Great point Natan. There’s certainly a lot you can learn, flag, and fix by going through those steps! :)
Straightforward and complete list of checks for everyone aiming at doing a great job when migrating a CMS. As Natan noticed, it is useful not only for migrations but for planned site audits or before starting to work with a new client as well.
Great guide, Glenn. I do about one migration a month (or so it seems) and I’m always on the lookout for these issues. The redirect chains issue is an important once since they can cause a clear dip in organic rankings/traffic due to lost link equity. We had an issue for a client, recently, whose new CMS was preventing crawl of paginated category pages and product pages therefore were not full crawled/indexed..and they were missing internal link equity. When analyzing Google Analytics, it was clear that product pages were the big driver in the traffic drop. Temporary fix is to get an HTML Sitemap produced for just the products, and linked from the footer. There’s so many things that can go wrong!
Good checklist. I’ll note it because my own migration is coming)