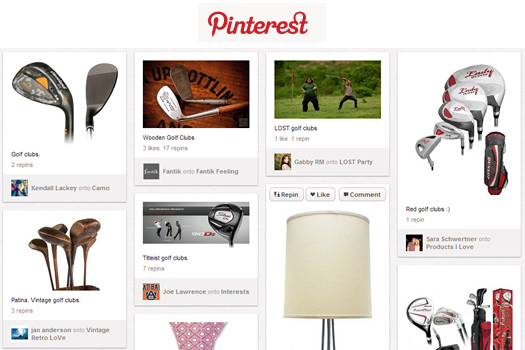
There’s a good chance you’ve heard of Pinterest lately. It has been all over the news, as it’s growing like mad, and driving a lot of traffic to ecommerce retailers. If you’re not familiar with Pinterest, it’s a new social network/application that enables users to pin photos to virtual pinboards, organized by topic. Once pinned, other users can view your photos and pinboards, “repin” photos to their own pinboards, comment on photos, and like them. This had led to an explosion of traffic for some websites, especially ecommerce retailers. Many people use Pinterest when researching new purchases, to organize ideas, etc. For example, I just created a pinboard containing the top golf drivers I’m researching for the 2012 season. That’s if I get to play this year. :)
Based on the rapid growth of Pinterest, and all the buzz associated with that growth, I’ve received a lot of questions recently about how ecommerce retailers could get more involved. Also, website owners want to know the best ways to make it easier for Pinterest users to pin photos that are located on their respective websites. So, I decided to write this post to explain various ways to include the “Pin It” button on a website. I will include instructions and information below for how to include a “Pin It” button on a webpage, on a WordPress blog or website, and how to address adding the “Pin It” button to an ecommerce CMS (which is the most challenging of the three).
What is the “Pin It” Button?
Before we hop into the instructions, I’ll quickly cover what the “Pin It” button is. You have inevitably seen Like buttons, Tweet buttons, +1 buttons, etc. as you travel the web. Those social plugins make it easier for users to share content to Facebook, Twitter, and Google+ from websites across the web. Well, Pinterest also wants to make it easier for users to quickly pin content. So, they created the “Pin It” button. In its simplest form, it’s a small button that you can place on a webpage that enables users to quickly pin content to a pinboard, while also showing how many “pins” it has received. You can tailor the code of the “Pin It” button to specify the URL of the webpage, the URL of the image you want users to pin, and the description that populates the “Pin It” form. You can also tailor how the “Pin It” button displays on your webpages.
The “Pin It” button (both horizontal and vertical layout listed below):

Since there are several types of websites, and each brings its own type of installation, I’ll cover a few of the most common methods below. My hope is that the following information and instructions can help you get up and running quickly. Let’s face it, if you make it easier for users to pin content, the greater chance you have of receiving a spike of traffic from Pinterest. Let’s jump in.
Instructions for Adding the Pinterest Button to a Simple Webpage
This is the most basic implementation of the “Pin It” button. Let’s say you have a webpage with a killer photo of your core product. Maybe you don’t have many products, but just sell a handful of core products. If that’s the case, you could use the following instructions to add a “Pin It” button to those product webpages.
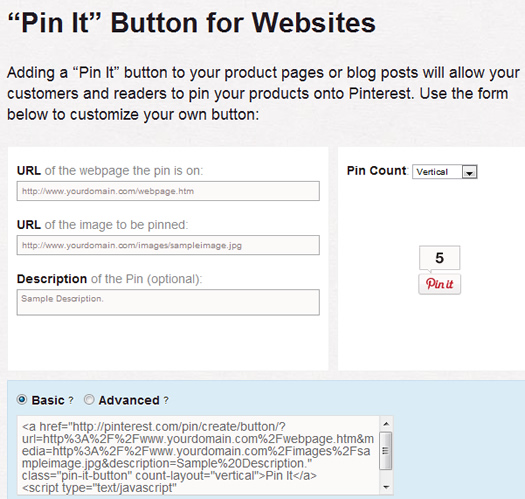
Pinterest has created a simple tool on its website to help webmasters create a static “Pin It” button. You can visit http://pinterest.com/about/goodies/ and scroll down to section titled “Pin It” Button for Websites. You will see fields for URL of the webpage the photo is located on, URL of the image located on your servers, and then a description field. The description is optional, but I highly recommend adding that to make it easier for users (since it auto-populates the “pin it” form once the button is clicked). You can also select how the “Pin It” button displays. There is a dropdown that lets you choose if the pin count shows up next to or above the pin button. You can also choose to not show the pin count at all.
Once you enter the required information, Pinterest will generate the code for you below the form. Then you can copy the code and add it to your webpage. There is “Basic” code and “Advanced Code”. The advanced code loads asynchronously, which can help with performance. Also, you should use the advanced code when you want to add several pin buttons to one webpage. You will need to add the resulting code to your webpage (in your html).
Screenshot of what the “Pin It” button form looks like when populated with sample data:

How To Add a Pinterest Button to a WordPress Blog (via a WordPress Plugin)
If you are running a WordPress blog, you are in luck. There are several plugins that you can install that makes it easy to add “Pin It” buttons to your blog posts and pages. I’ll explain two of those plugins below.
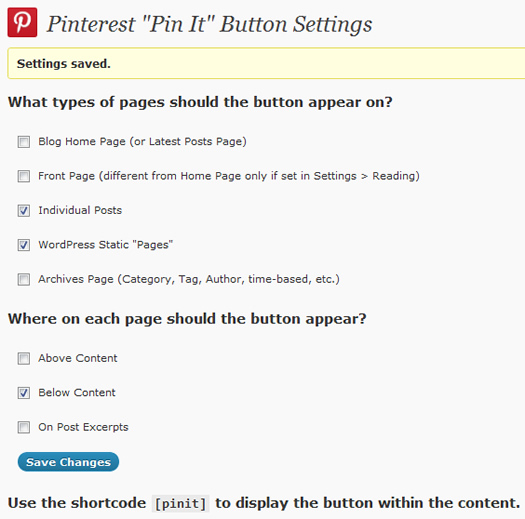
The first plugin I’ll cover is called Pinterest Pin It Button, and it provides some great functionality. Using this plugin, you can add “Pin It” buttons to your posts, pages, homepage, archives, etc. In addition, you can choose to show the “Pin It” button either above or below your main content. For even more customization, you can use a shortcode in your post to add the “Pin It” button within your main content. For example, you can use the shortcode [pinit] within your post to add the “Pin It” button within your content (versus just at the top or bottom of the post).
The Pinterest “Pin It” Button plugin settings in WordPress:

The second plugin I’ll cover offers basic “Pin It” button functionality. The Pin It on Pinterest plugin adds a “Pin It” button at the end of your posts, and it enables you to select which image should get pinned, as well as what the pre-populated description should be. Once installed, you will see Pinterest options in your post editor within WordPress.
How to Add a Pinterest Button to an eCommerce CMS
I mentioned earlier that adding a “Pin It” button to an ecommerce CMS is the most challenging to address. The reason is simple. When you have hundreds (or thousands) of products being handled dynamically by a content management system (CMS), you can’t simply add a static pin it button like we did earlier in the post. The code needs to be dynamically tailored based on the product at hand. There aren’t separate pages for each product within an ecommerce CMS, but instead, the CMS dynamically handles each product via database-driven code. This means you cannot simply ftp product pages to your server for each product you sell on your website. The underlying code needs to determine the right URL’s and description for the “Pin It” button.
In order to add any code to an ecommerce CMS that addresses the specific URL, images within the post, etc., you will need to understand the specific functions and variables that your CMS uses. By the way, even WordPress works this way. WordPress is a CMS, although many people don’t realize this. For example, there is a function that WordPress uses to determine the current URL, and it looks like this:
In WordPress, the_permalink() returns the current URL, which can be used to populate the “Pin It” button code. This is the approach you would need to use for your own CMS. The good news is that any reputable ecommerce CMS will provide a reference guide that includes the various functions and variables that can be used. Actually, it’s common to use these functions and variables to perform other tasks.
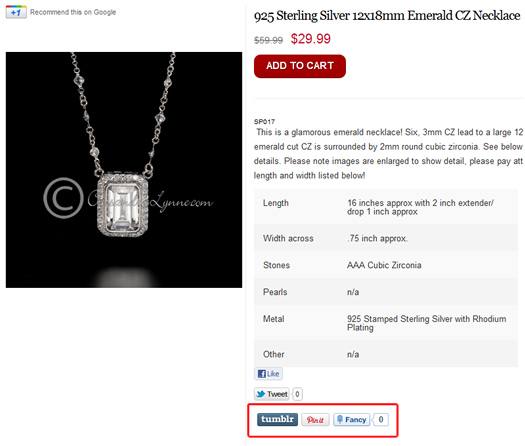
For example, here is a webpage explaining how to add a pin it button to Shopify. You’ll notice that the example includes variables specific to Shopify for determining the current URL, image URL, and description. Again, your own ecommerce CMS provider should provide similar variables you can use when adding the pin it button to your website.
A “Pin It” button on a Shopify ecommerce website:

My recommendation is to contact your ecommerce CMS provider and track down the necessary code for referencing the current page, images within product pages, and the description you want to use for the image. Once you have that information, you can add the necessary code to your CMS template or theme to handle the “Pin It” button. It will then dynamically pull the correct information for each product page on your website.
Summary – Enable Users to Pin Content Easily
I hope this post helped you understand more about Pinterest, including how to add a “Pin It” button to your website, WordPress blog, or ecommerce CMS. Pinterest is growing rapidly and adding the “Pin It” button to your website can make it easier for users to share your content. This can give you a greater chance of having that content get noticed, shared, etc., which can result in increased traffic, exposure, and sales. And that’s what ecommerce is all about!
I recommend you start thinking about Pinterest today. You should speak with your development team or programmer to see how you can implement the “Pin It” button soon. Pins are waiting. :)
GG
